One of many integrations available for Acumatica includes one for Adobe Acrobat that lets you sync data and upload PDFs into your ERP, among several other features. Discover how to get set up and begin taking advantage of all of these capabilities with this video demo and walkthrough by SWK Solutions Architect Ayham Mattar:
Acumatica Adobe Integration Transcript
Hi, welcome, my name is Ayham Mattar. I am a Jr. Solutions Architect at SWK Tech, and today I just want to go over Acumatica’s Adobe PDF integration.
So, this is something that can be put into the system, um, it’s a quick customization, doesn’t take long. What I’m going to go over right now is, I’m going to show you how to access it if it were in the system, and the features that it has.
So, what I’m going to do right now is I’m going to head over to my Construction, and to my Projects tab. From here, as you can see, I have several projects lined up. I have one with the yellow tab here, which shows me that there is an attachment. So, this is the project that we’re going to look at today.
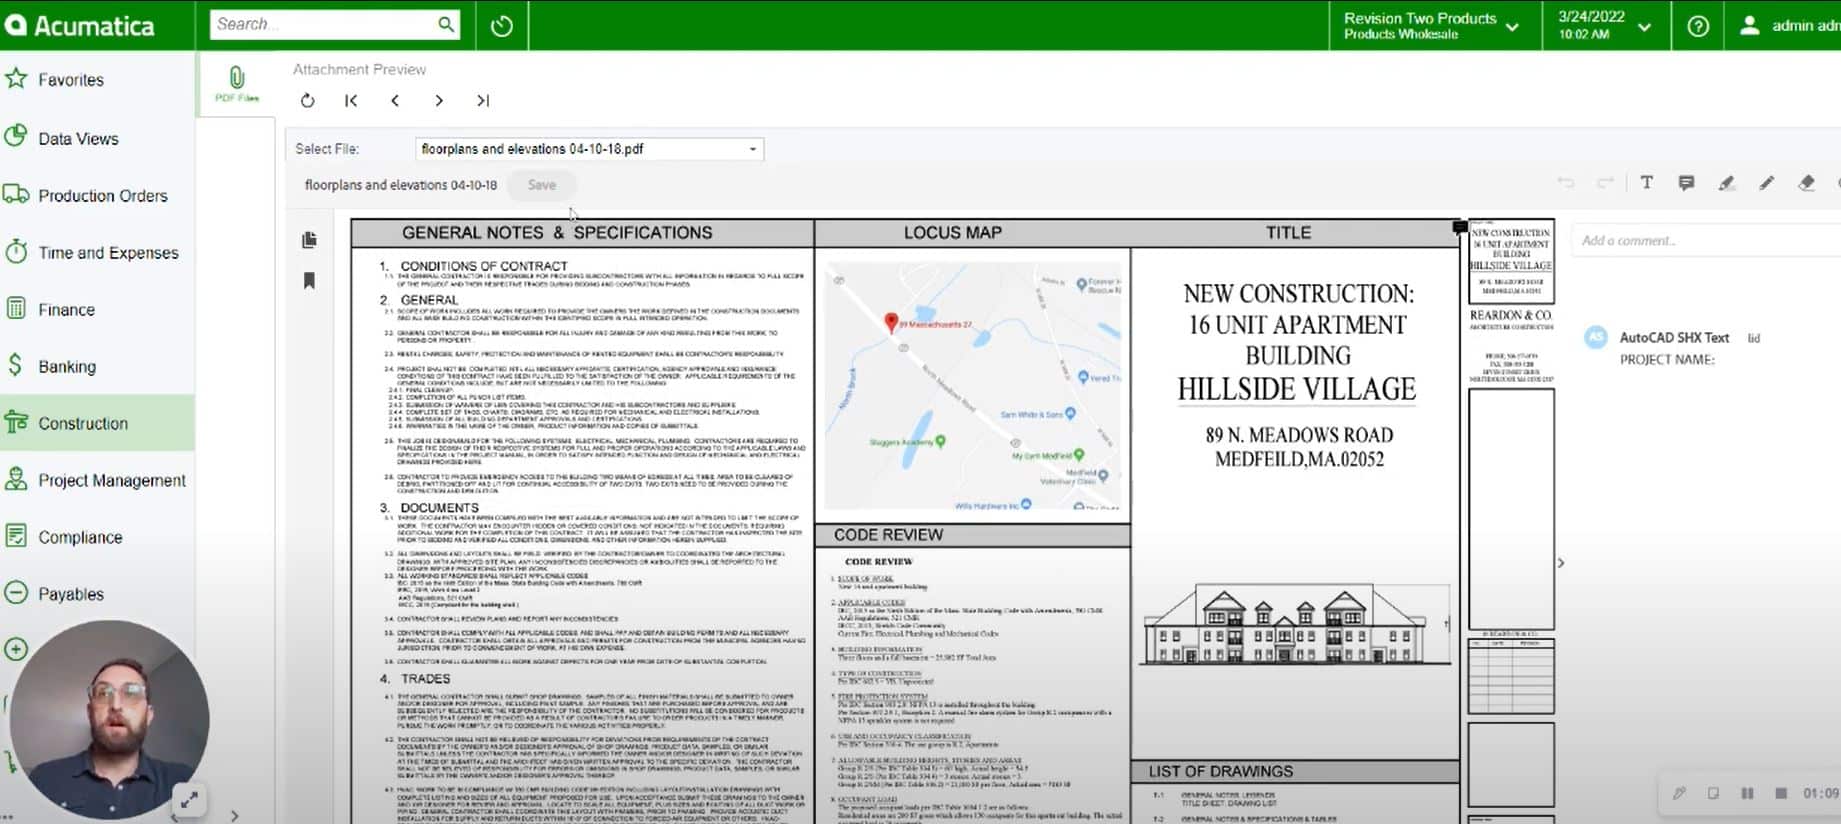
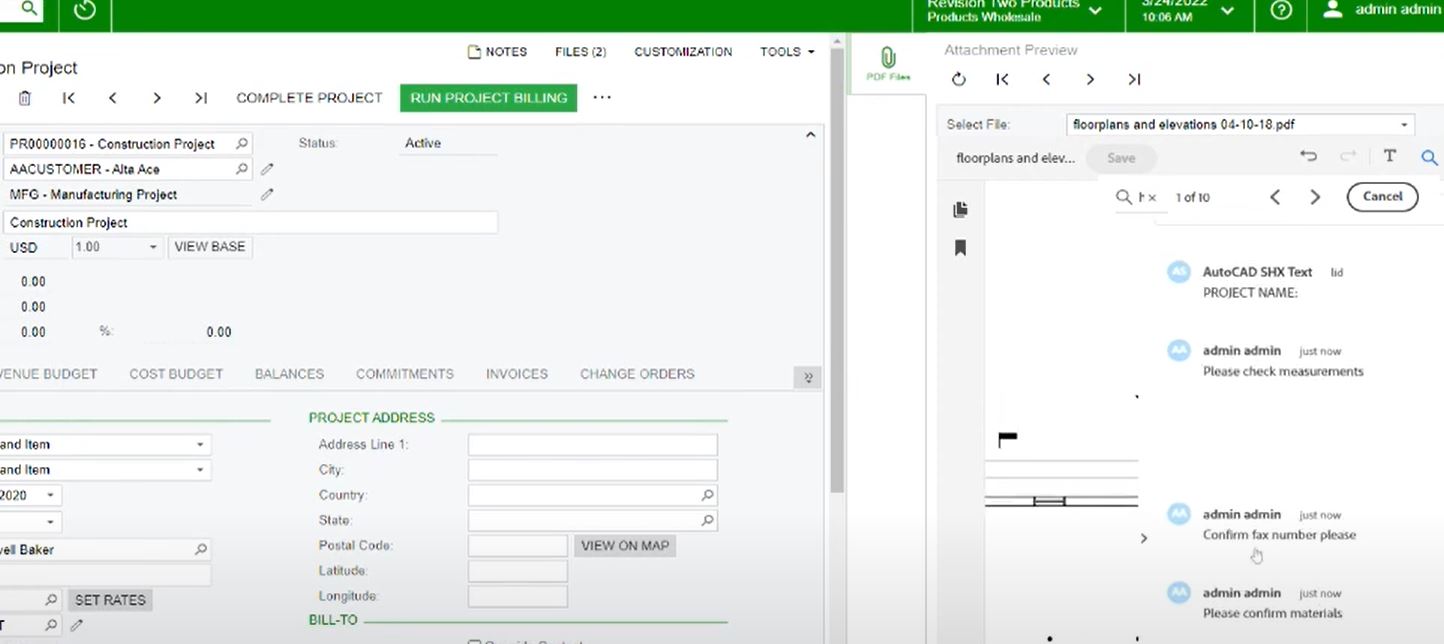
I’ll click into the project by clicking on this hyperlink and then from here we can see there are two files attached to this project. What I’m going to click on right here is the PDF files on the right. So, this is the side panel that’s been put into the software. By clicking here, it will take me into our PDF annotator, and you can see that there are several buttons, there’s file options that you can choose from.
We’re going to work from this file today. There are options to refresh, so if somebody’s uploading a file and you are in the system currently and you want to access it, you’re going to let them upload it – you just hit the refresh button, it brings a file up you can move forward and backwards through the file.
So, if I push forward here, it’ll take me to the next file but we’re going to stick with the one we were working on. And from here we’re just going to go over some of the features and the functions that are available.
Now, you can see on this side panel right here the first thing is that there are there is a note, somebody did leave a sticky note up here, I’m going to get to those in a minute. So, if I scroll a little bit further down here, we can see a drawing that someone has made; now, all the buttons and the features are mainly faced up here.
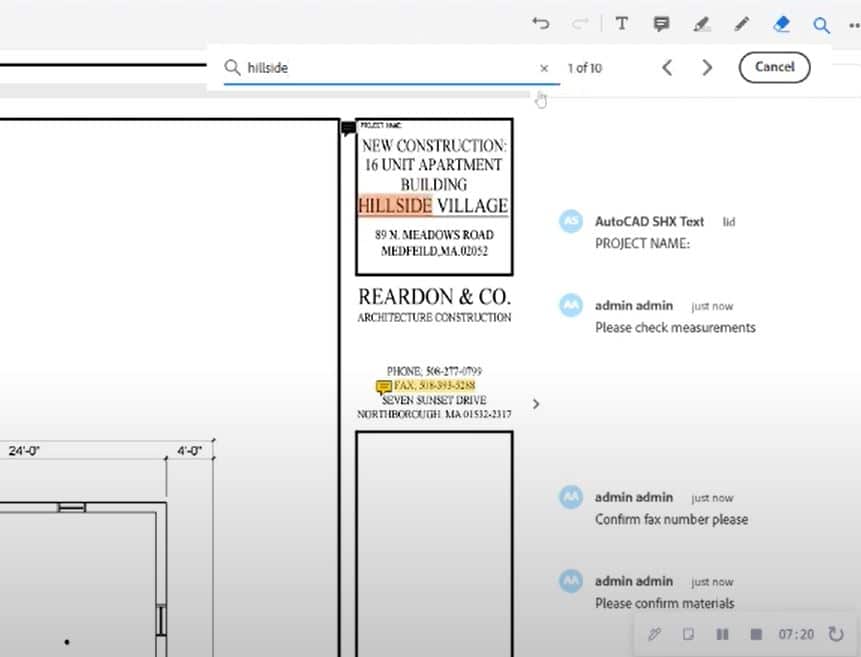
I can add text into any of these; so, if I click on add text comments, I can click anywhere I want to in the document and I can write anything I want to. I could say, “please check measurements.” Now, it is a little bit small, so if you needed to you can just use your mouse to zoom in and out.
So, that note’s there, I can see in this panel here that it’s listed, what I’ve written in there as well. If somebody needs to add to it and it says who is it, who has added that, so I have added that now as the administrator. So, if somebody else were to come in and put a note in it would show that they have marked up the document themselves.
The other thing we can do is add sticky notes. So, if I do that, you can see the sticky note comes up in yellow and from here I can just make sure that I say, “please confirm materials.” From there now, I just press enter and that’s done, that’s in the system.
The other features that are available are, we have a highlighter tool up here, so any text that’s already in the documents a document have to be saved um with OCR, so optical character recognition. So whatever software you’re using for your PDFs, you can save it and enable OCR so it can recognize the letters as characters instead of just a general image.
So, from here if I click on the Highlight Text, I can highlight here and that would highlight what I’ve selected. It’ll give me an option to write in what I need to. So, confirm fax number please, so that’s posted now just by clicking here.
There is also an option to draw. So, if I use the drawing tool right here I can circle something, so I’ve chosen to circle this. I can draw anything I want to.
From here the next thing you can do is you can erase what you’ve drawn, so just go over it and a nice little handy eraser tool as well.
The other option it gives us is we can search through here. So, if I search for the word “hillside,” that’s it, it’ll show me 10 spots in the documents the word “hillside” pops up.
And then the other features that are available, the other options you have here, are you can download the PDF, you can print it, and obviously there’s some legal notices there.
Now, no matter what you do in this it’s important to always remember that you should press the Save button, you don’t want to lose anything you’re doing. By just hitting that, it saves the edits you’ve made, it’s made the highlights, and these will be open for anybody else who comes into the system to use them.
The key benefits of this, it does offer easy navigation for everybody so you can access and edit documents from one screen.
Now, a good thing to show here is that you can resize this window. This tab right here would push the side panel away and close it, that would reopen it, and this puts it on the side. So, if there’s any data on the left that you need to check and insert or work from you could type it in here and have both going at the same time. I prefer having it full screen, just makes a clearer picture. So, as I said before you can zoom in and out depending on what you need, what your needs are, and the size screen you have I suppose.
It lets you annotate things in real time. so, from here you can mockup PDF attachments easily with the sticky notes, the comments ,the highlighting, and the sketches as well. You can have rigorous version control as well, that’s a really important thing to note.
You can automatically save all the annotations made to the PDF files and you keep them aligned to the corresponding records. So, you’ll see different versions, when you save this different versions will appear and there is version control on this because there is a full audit history. This makes collaboration with others easy, it makes it pretty clear that you can work on it you can work on it and then somebody else can edit things or mock up afterwards. It doesn’t allow people to work on the document at the same time, so if one person is making edits it won’t allow anybody else to.
It just, the editing tools add a lot of good, simple features to help somebody just clarify between colleagues or make simple edits. So, if there was a change that needed to be made in this document here, I could put a sticky note, I could highlight I can let everybody know what’s going on.
That is the simplicity of it, it’s a really useful tool it’s a simple install as well. if you have any questions, please feel free to reach out as well. Thank you.
Discover More Tips, Tricks and Other Features for Acumatica
SWK Technologies will help you get the most out of your ERP investment, leveraging our deep technological and industry knowledge as a top Acumatica partner and Community resource. Check out some of our Acumatica videos and other educational resources, and reach out to us when you’re ready to learn more tips and tricks to maximize your value return on your software.
Contact SWK here to gain access to more Acumatica tips, tricks, updates and tailored demos.
Get More Acumatica Tips & Tricks


