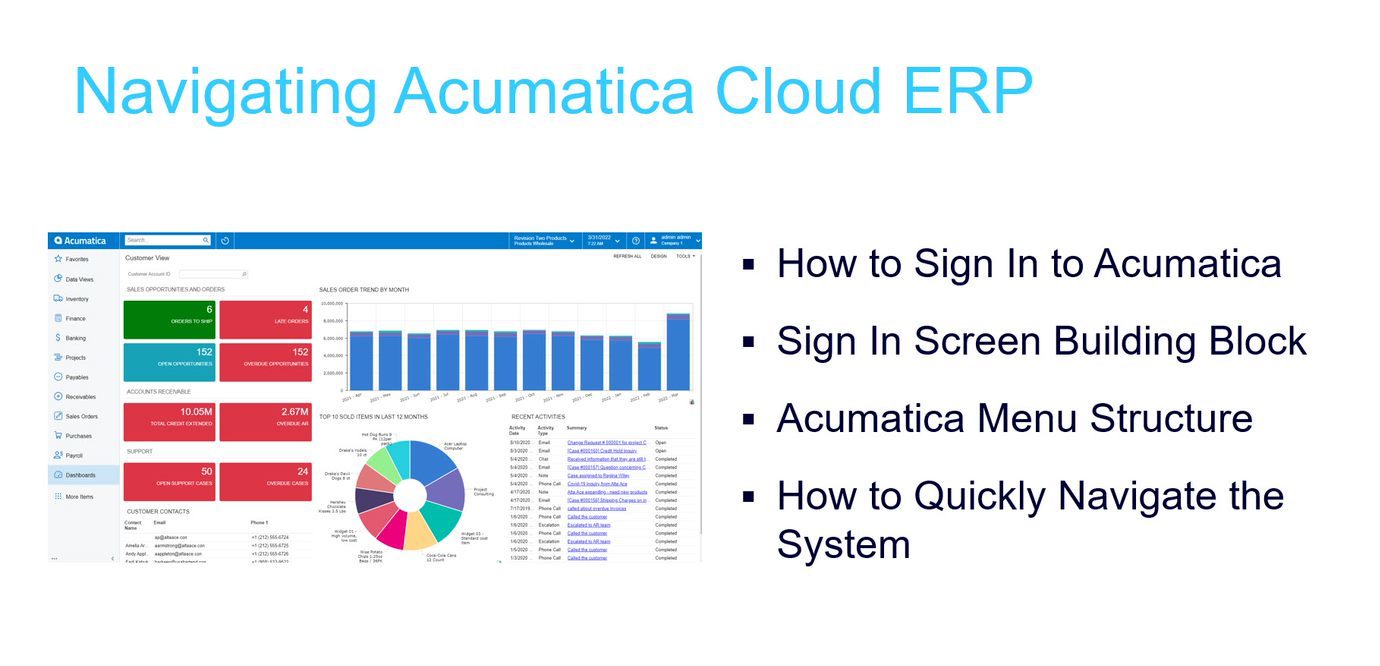
Discover all the tricks to navigating Acumatica with this comprehensive and informative video narrated by SWK Technologies Product Marketing VP of Acumatica, Joel Gress. This walkthrough will break down each and every part of the starting user interface (UI) while drilling down into the deeper levels of functionality this modern cloud system has to offer. Watch the demo* below to learn more about how to navigate Acumatica Cloud ERP:
*Note: This demo uses Acumatica 2022 R1
Navigating Acumatica Transcript
Hi, and thank you for joining me today to review Acumatica Cloud ERP navigation. Navigating Acumatica Cloud ERP is easy and intuitive. Understanding the building blocks will help you take full advantage of the available features and functions.
At the top of the screen is your URL, or uniform resource locator. For hosted instances of Acumatica, this is the unique address to the hosted servers managed by Acumatica where your company’s specific installation of Acumatica resides. The URL is unique to your organization. The “Select a tenant” section is where you select which tenant or container of connected Companies and or Branches you wish to access.
Note that the system can be configured to require user authentication prior to displaying only those tenants to which the user is granted access rights. Now, if your instance of Acumatica has only one tenant, this section will not display.
In my credentials section is where I put in my user ID and password. it’s also where I have my sign-in button, and an option, if configured in your system, to say I forgot my credentials and perform self-service password recovery. Now, if you have two-factor authentication (2FA) and/or single sign-on (SSO) enabled you’re likely going to see additional options displayed in this section here.
The bottom is your informational section. Here, you can see your Acumatica Cloud ERP version and specific build number for your instance of Acumatica. If you had customization projects that were published those would be listed here as well. In this instance of Acumatica, I don’t have any customization projects published. Let’s go ahead and sign in.
Now that we’ve signed into Acumatica, I’m seeing my user-specific objects which I have access to. Those are menu items, those are toolbar items, those are dashboards, reports and queries within the system, OK. The granularity of security in Acumatica is down to the object level within all of the screens as well as the ability to perform data filtering for users.
So, this is my home screen and here I have this dashboard, it’s “Customer View.” If I were to navigate away from this home screen and I wanted to get back to it, I click my Home button in the upper left. You see it’s refreshing my screen and bringing me back to that home screen, which is a screen that I see when I perform my initial login to the system, okay.
Currently it has an Acumatica logo, and within the company’s configuration you have the ability to specify what is that logo, as well as the color scheme within the system.
To the left of there is my Universal Search. The Universal Search gives you the ability to search across the system with a text string and look into multiple different objects within the system to find those values. Some of the examples that you can search would be things like menu items, form titles, help topics, files, notes and entities that have been created in the system, forms such as vendors, customers, prospects, employees, leads, and cases, okay.
So, let’s go ahead and see what that looks like. I’m going to go ahead and type in “ABC,” and my search pulls up initially my menu items you can see I have processes and preferences that include the text string ABC. If I click on “Transactions and Profiles” here, you’re seeing a host of transactions that include ABC.
I have the ability to click the next button and continue to find additional items that include that ABC string. I can go to my Help topics and here I’m seeing a listing of help topics that include the text string again of ABC. And Files, once again surprise, surprise the text string ABC. Clicking on any one of these items will direct me to that either menu, transaction, profile, help topic, or file within the system. Let’s go ahead and close this workspace.
The next item on the toolbar is my Recently Viewed items. These are organized by record types and on the left you can see I’ve selected All records and so here I’m seeing my Records section. If I were to filter down to AR invoices and memos, you see my record display changes.
Let’s go back up to All records. I do have a section over here for Favorites; so, let’s go ahead and add this GL batch to my Favorites. I’m going to refresh my Recently Viewed and now you see my Favorite that I had selected previously is showing as a Favorite record to the right, making it easier for me to get back to those Favorites. I’m going to go ahead and remove it by clicking on the star from my Favorites, and if I refresh you can see now it’s been removed from my Favorites.
The next section on our screen is our Company Branch Lookup. It gives me the ability to move between Companies and Branches. You can see here I have three Companies and four Branches.
My Companies are Revision Two Capital, Revision Two Products, Revision Two Services. My Branches, two Branches within Revision Two Products are Products Retail and Products Wholesale, and two Branches within Revision Two Services of Services East and Services West.
if I wanted to move between these entities I could simply click because I have access rights to this branch within this company and it’ll log me in and show me my items that I have access rights to.
You’ll also notice that the color scheme changed. The logo can change, you have control over what the color scheme and logo is for each of your Companies in each of your Branches, providing a visual cue so your users know where they are. Let’s go back to Product Wholesale, which is my home company.
The next item on my menu is my date control. Because of my access rights I can view and change this control. It comes in handy when I need to backdate transactions.
So, let’s say we’ve moved into a new month and I’m still receiving bills from my vendors for the previous month; it’s really handy for me to go in as an AP clerk, set my date back to the last day of the previous month, and go ahead and perform my input for the batch of transactions that I have to process for my vendors. Once I’m done, I can change my date back to the current date and begin processing in a new month.
The question mark is my context-sensitive Help. It knows I’m on a dashboard, so it brings up information around dashboards -how to modify them, how to add a dashboard form, widget settings and so forth, as well as a variety of related topics and a form reference and online help through educational resources and Acumatica news.
The next section allows me to switch between tenants. Well, I’ve got them listed as Company One and Company Two, they’re actually individual tenants which represent a grouping of Companies and/or Branches. I’ve been operating in Company One as you recall from my initial login, I selected my tenant as Company One.
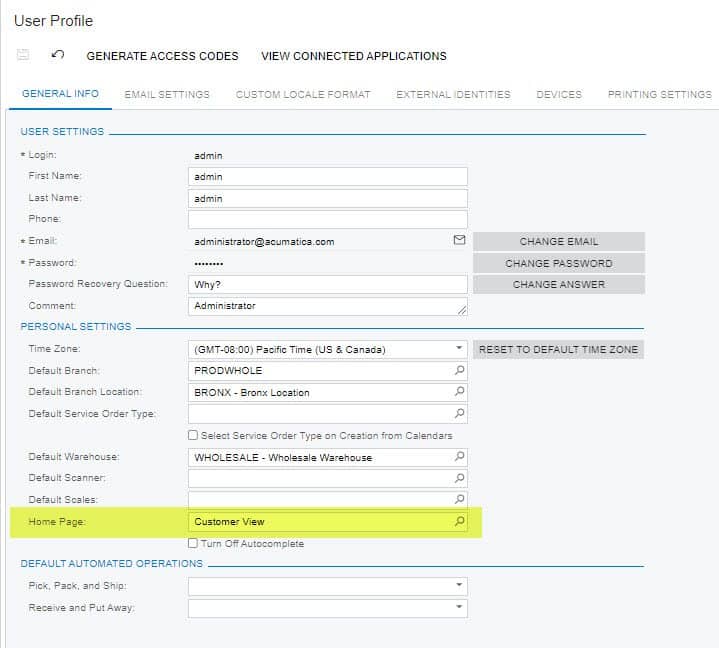
I can also go to my Profile. My Profile allows me to control a host of individual controls which we’ll go into in a different session. And I can sign out.
On the left-hand side, we have our menu items. Within the menu items are the workspaces that I have pinned to the menu. That means, this is what I work with.
There’s a host of other options that I could have pinned to the menu as well. If I like working with Fixed Assets I can come over and click the pin – and note, Fixed Assets now displays. If I want to remove Fixed Assets as a pinned item, I can remove it from the menu there.
Note that the items that are pinned are the ones that you work with most often. All items remain available by clicking More Items. Clicking on one of these menu items opens up a workspace.
Within a workspace I can configure tiles for quick access to most used items. I also have categories that are configured within the system and under those categories I have forms as well as reports that I can quickly access.
Right now, I’m showing my quick menu. if I click “Show All” I can see all of my menu items. If I wish to modify what’s part of my quick menu, I can click the cog in the upper right and select to add some items in here.
In this case I’m going to remove Post Transactions and Run Allocations. I click exit and I go back to my quick menu and now I see that those processes of Post Transactions has been removed. if I come back here, I can go ahead and, say, Release Vouchers and post transactions, let’s add them back in and exit, and now I see that they’re back on my short menu.
When I hover over a menu item I have the ability to click on it and go into search mode, to view all open journal transactions in this case, where I have the ability to add it as a Favorite or I can click and say show me a new item. And right now, I’ve just moved directly into input mode.
Now, I clicked on my Favorite, where’d that Favorite go – well one of the items or workspaces on my menu is my Favorites and you can see here’s my journal transaction. If I want to remove it from my Favorites, I click the asterisks and next time I come in here, I can see I have no Favorites.
As I mentioned before the search menu can be used to find menu items. if I type in the first part of “journal transaction,” you’ll see I show journal transactions and journal vouchers. Here I see transactions that include “jour” but if I come back and I just click on that menu item it takes me into my search pane. Using this search bar is a great way to navigate the system find the information you’re looking for and get there quickly.
Let’s go home.
Today, we quickly covered how to log into Acumatica the building blocks that make up the Acumatica sign in screen as well as the menu structure and how to quickly navigate the system.
Discover More Tips, Tricks and Other Features for Acumatica
SWK Technologies will help you get the most out of your ERP investment, leveraging our deep technological and industry knowledge as a top Acumatica partner and Community resource. Check out some of our Acumatica videos and other educational resources, and reach out to us when you’re ready to learn more tips and tricks to maximize your value return on your software.
Contact SWK here to gain access to more Acumatica tips, tricks, updates, and tailored demos.
Get More Acumatica Tips & Tricks


