Tosin Akin-Tewe
Acumatica Consultant
SWK Technologies, Inc.
Acumatica allows you to create and assign a Class to every vendor or customer account, as well as for stock and non-stock items when managing inventory controls. These Classes let you group those accounts based on shared or similar characteristics, such as currency used, products regularly purchased, locations being used or tax category. This lets you take advantage of automated reporting and other workflows between the General Ledger, Inventory, Accounts Payable, Accounts Receivable and other modules in Acumatica Cloud ERP.
In this guide, SWK Technologies will show you how to create a Class for Vendors, Customers and Stock Items for AP, AR and inventory Items, respectively:
Accounts Payable: Vendor Classes
In Acumatica ERP:
- A Vendor Class groups vendors that have similar characteristics.
- Vendor Classes can be based on the types of goods or services purchased from vendors of the class or on other properties, such as the vendors’ currency and payment methods. For instance, you might find it useful to create one Vendor Class for tax agencies and another for 1099 vendors.
- Vendor Classes provide default values for individual vendor accounts, so users can create vendor accounts more easily.
Creation of a Vendor Class
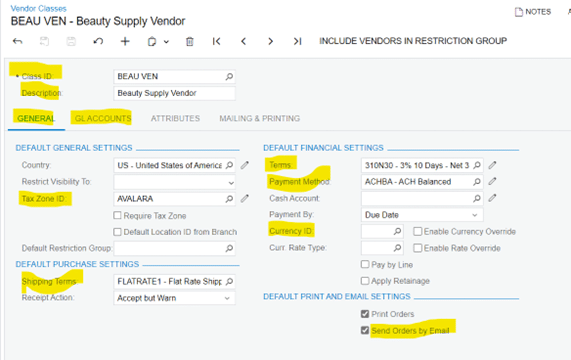
Vendor Classes and their settings is defined on the Vendor Classes (AP201000) form.
During basic system configuration, a default Vendor Class which will provide many of the settings for newly created vendors needs to be created; and specified as the default Vendor Class on the Accounts Payable Preferences (AP101000) form. It is recommended that the default Vendor Class should contain the largest number of vendors (and thus the most common values). Besides the class ID and description, which are the required settings of a Vendor Class, it can contain additional elements such as the:
- Credit terms
- Currency
- Country
- Tax zone
- Specific general ledger accounts and subaccounts (if using)
- Default cash account and payment method.

When a new vendor account is created, by default, it will be assigned to the Default Vendor Class and the system fills in the values of the class for the vendor. Any of these default values can be overridden to meet the specific settings for the vendor.
Accounts Receivable: Customer Classes
In Acumatica ERP:
- A Customer Class groups customers that have similar characteristics.
- Customer Classes can be based on the types of goods or services the customers buy or on other properties, such as each customer’s currency and payment method.
- Customer Classes provide default values for individual customer accounts, so users can create customer accounts more easily.
Creation of a Customer Class
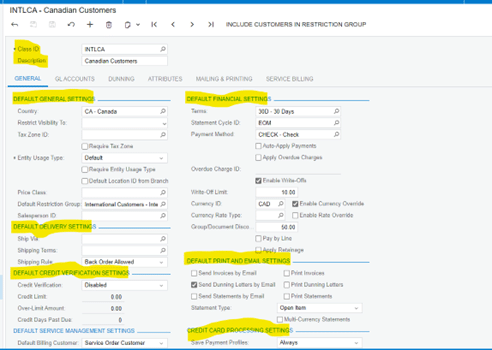
You define Customer Classes and their settings on the Customer Classes (AR201000) form.
During basic system configuration, a default Customer Class which will provide many of the settings for newly created Customers needs to be created; and specified as the default Customer Class on the Accounts Receivable Preferences (AR101000) form. It is recommended that the default Customer Class should contain the largest number of customers (and thus the most common values). Besides the Class ID and description, which are the required settings of a Customer Class, it can contain additional elements such as the:
- Credit terms
- Statement cycle
- Payment method
- General settings
- Credit verification settings
- Delivery settings
- General ledger accounts and subaccounts (if using)

When a new customer account is created, by default, it will be assigned to the Default Customer Class and the system fills in the values of the class for the customer. Any of these default values can be overridden to meet the specific settings for the customer.
Item Classes: Stock Items
The primary inventory entity defined in Acumatica ERP is stock items: the finished goods and raw materials that cost money, have value, and are stored somewhere. Before creating stock items in the system, entities that are used in the item’s settings need to be created. An Item Class is one of the entities that need to be created in the system before stock items are created. Item Classes are used to group stock items with similar properties and provide default settings for newly created items.
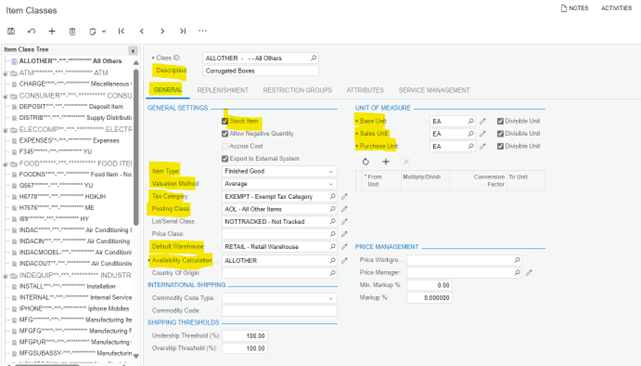
Users specify an Item Class when they create a new stock item on the Stock Items (IN202500) form, and the system fills in many values, thus saving users time and increasing the accuracy of the entered data. Some of these default values can be overridden for individual items, if needed. The Item Class is a required setting for a stock item.
When an Item Class is selected for a stock item, the system copies the following default settings from the Item Class:
- Item type
- Valuation method
- Tax category
- Posting class
- Lot/Serial class
- Default warehouse
- Units of measure
- Attributes
- Replenishment settings
Item Classes can be planned so that they aggregate as much information as possible about groups of similar inventory items. If configured in this way, the minimum of information for individual inventory items during manual data entry or importing a file can be specified—for example, only Inventory ID, Description and Item Class—while the rest of the information will be automatically populated based on the selected Item Class.

Discover More Tips, Tricks and Other Features for Acumatica
SWK Technologies will help you get the most out of your ERP investment, leveraging our deep technological and industry knowledge as a top Acumatica partner and Community resource. Check out some of our Acumatica videos and other educational resources, and reach out to us when you’re ready to learn more tips and tricks to maximize your value return on your software.
Contact SWK here to gain access to more Acumatica tips, tricks, updates, and tailored demos.
